Ricoh GlobalScan 2.0 Integration
Castelle FaxPress services for GlobalScan 2.0 enable Ricoh MFD customers to fax documents directly from the MFD console using Castelle FaxPress server. Castelle provides two services:
| ■ | Castelle Fax – Allows supervisors to configure a shared account so that users will not be required to login every time they need to send a fax. |
| ■ | Castelle Authenticated Fax - Allows supervisors to require that users be required to login using their personal FaxPress account in order to send a fax from the MFD. These two services are mutually exclusive. Upon installation and configuration of the system, supervisors will make the decision whether they will require users to login using their own personal FaxPress account before they are allowed to scan and fax the document through FaxPress. If the supervisor chooses not to require login, a gateway account must be added using the FaxPress client and then configured as a shared GlobalScan account using the service admin configuration interface. |
Installation Guide
To install the plug-in follow these steps:
| 1. | Before you run the installation make sure you have administration privileges on the machine |
| 2. | Unzip the installation file into a temporary folder (e.g. c:\temp) |
| 3. | Run the Setup program |
| 4. | InstallShield installation wizard will start and guide you through the process: |
Step 1: Welcome dialog
Step 2: Copy dialog
All files are copied to the Ricoh directories (as FaxPress for non-authenticated or FaxPressAuth for authenticated):
| ■ | FaxPress.DLL - The service DLL is copied to \RICOH\GlobalScan\Plugins\FaxPress |
| ■ | Admin ASP file are copied to G:\RICOH\GlobalScan\Web\Admin\Plugins\FaxPress |
| ■ | API ASP files are copied G:\RICOH\GlobalScan\Web\API\Plugins\FaxPress |
Step 3: Installation Complete dialog
Administration Guide
An supervisor will follow the GlobalScan 2.0 administration guide on how to add a new project that will include the FaxPress service.

After adding the service to the project, the supervisor needs to configure the service.
FaxPress Service Configurations
Click Configure, which is nextnext to the FaxPress service.

The FaxPress configuration screen is displayed.

| 1. | If the FaxPress server is on the same subnet as the GlobalScan server, its name will show up in the list. Otherwise, the supervisor needs to select Other from the Server List and manually type in the IP address of the FaxPress server. |
| 2. | Enter the User Name and Password, then press Login to verify connectivity to the server and account information. The list of cover pages are retrieved from the server and displayed in the cover page list once connection to the FaxPress server is established. |
| 3. | Press Update to update the service configuration |
| 4. | Press Cancel to exit. |
When Update is pressed in step 3, the service configuration is properly saved. Thus, do not be alarmed at having to press Cancel to exit this screen; your changes have been saved and properly applied.
User Guide
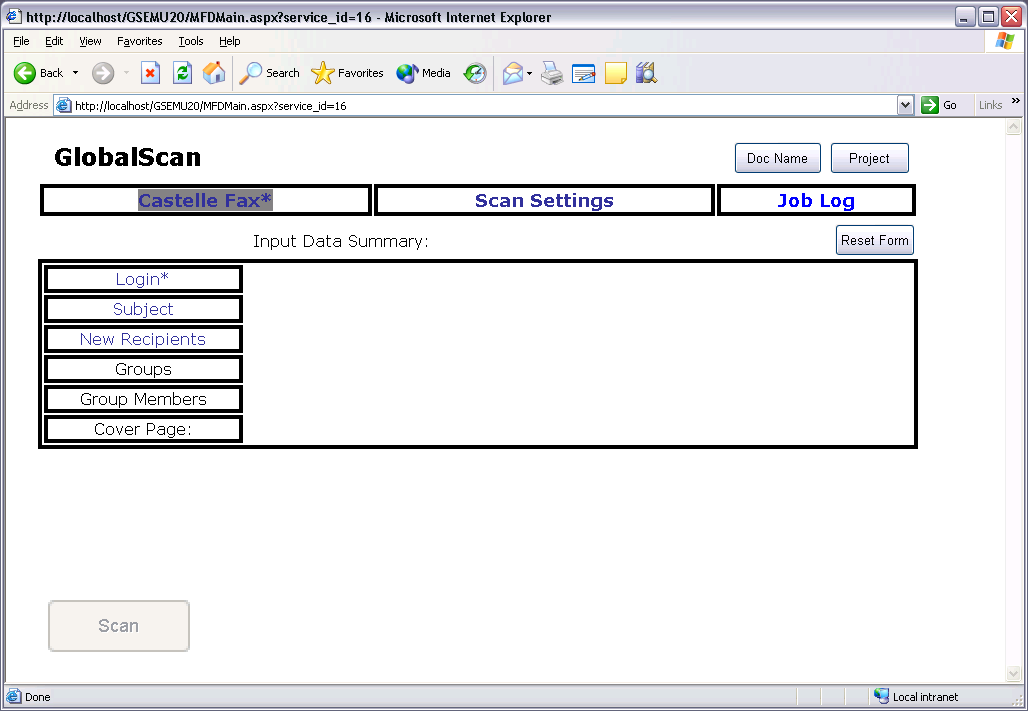
When the FaxPress service is configured, it shows up in the MFD GlobalScan console.
To send a fax, click Castelle Fax and configure the fax parameters:

From / Subject Form

New Recipient Form
To manually enter recipient information, click New Recipient.


Enter the recipient fax number, name and company and click OK. To enter multiple recipients, click New Recipient again. You will notice that the recipients are concatenated into the recipient list in the format name@fax number @ company. You can add as many recipients as needed.
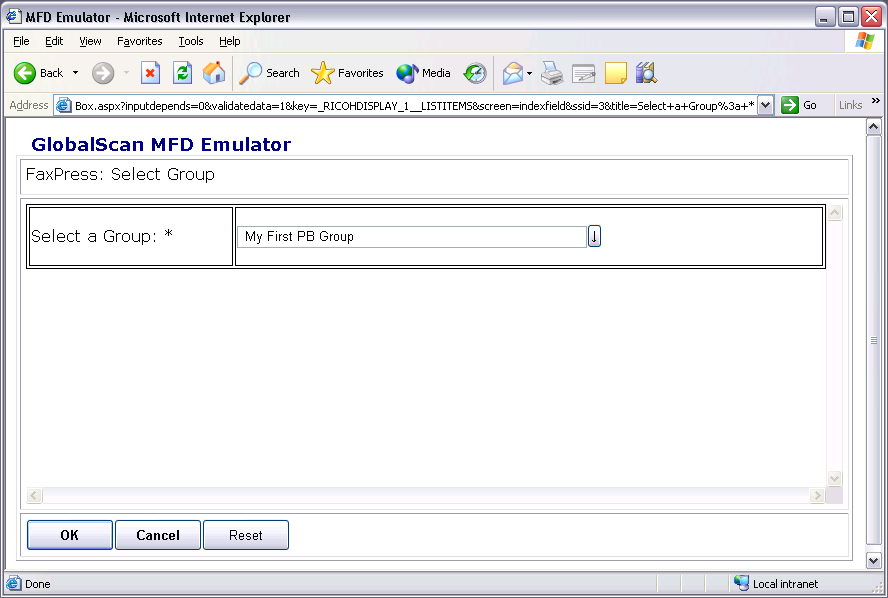
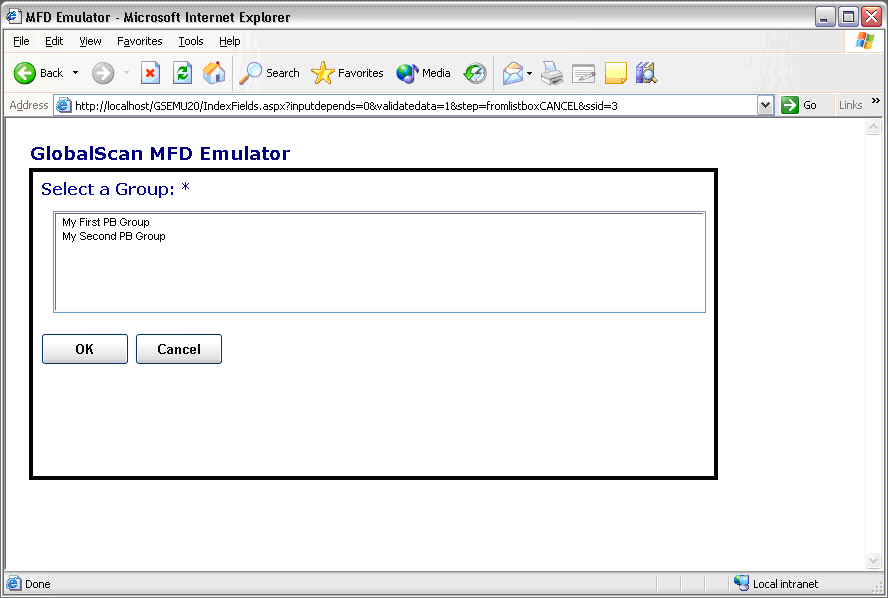
Group – Selecting External Phone Book Group
If your FaxPress server is configured to use an external database phonebook (ODBC phonebook), you can select the phonebook group. To change, click the down arrow and select the group name form the list.
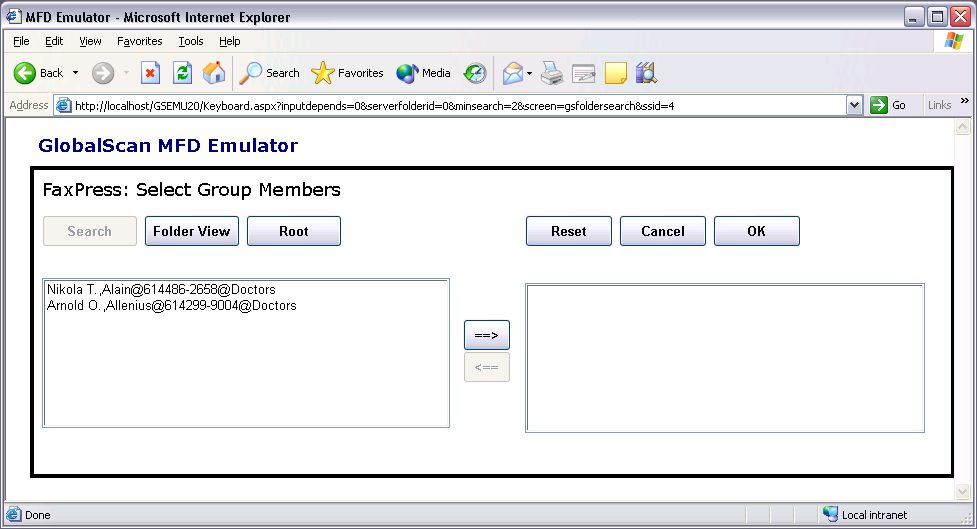
Group Members – Selecting Recipients Form an External Phone Book Group
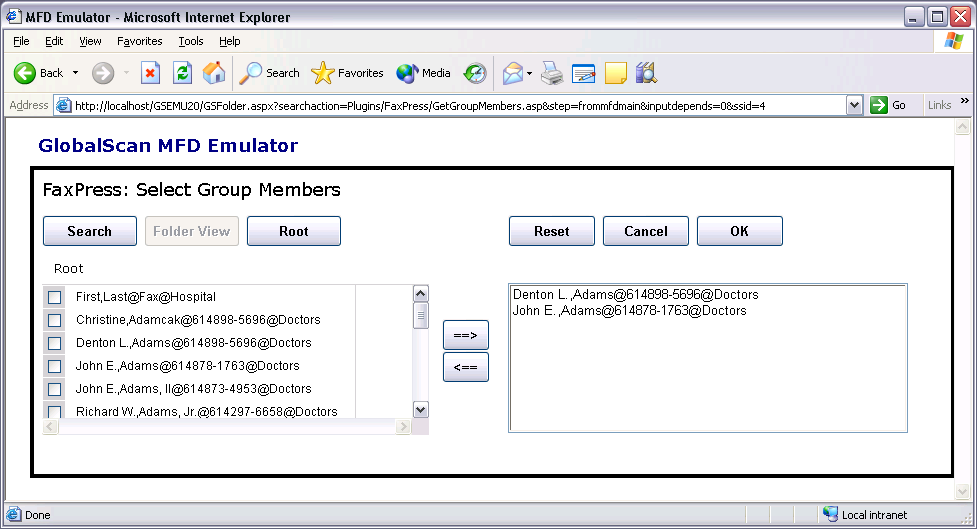
Once you select the group, click the Group Members and select the recipients from the phonebook. To search for a recipient, clickSearch and type in the first few letters of the recipient’s name. For example, to search for a name that contains Ni, type Ni. The list will display any and all names that start with the letters Ni.

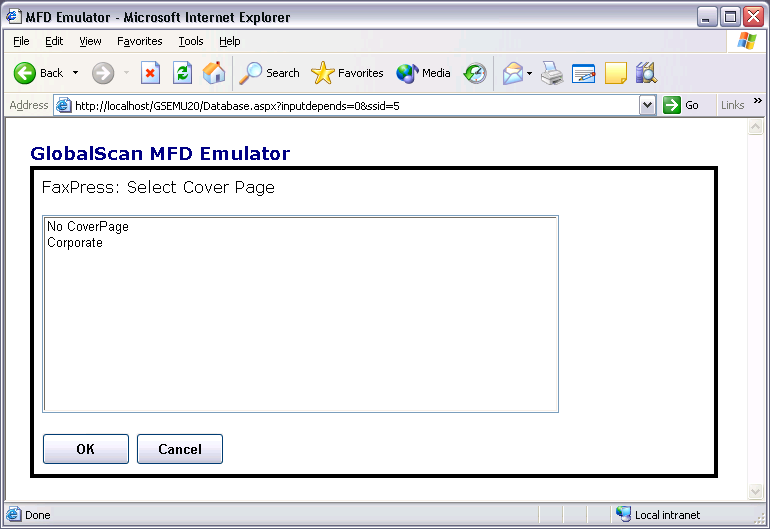
Cover Page
To select a cover page, click Cover Page. The list will show the available cover pages. FaxPress supports Corporate or no cover page (FaxPress Premier supports multiple Corporate and personal cover pages).
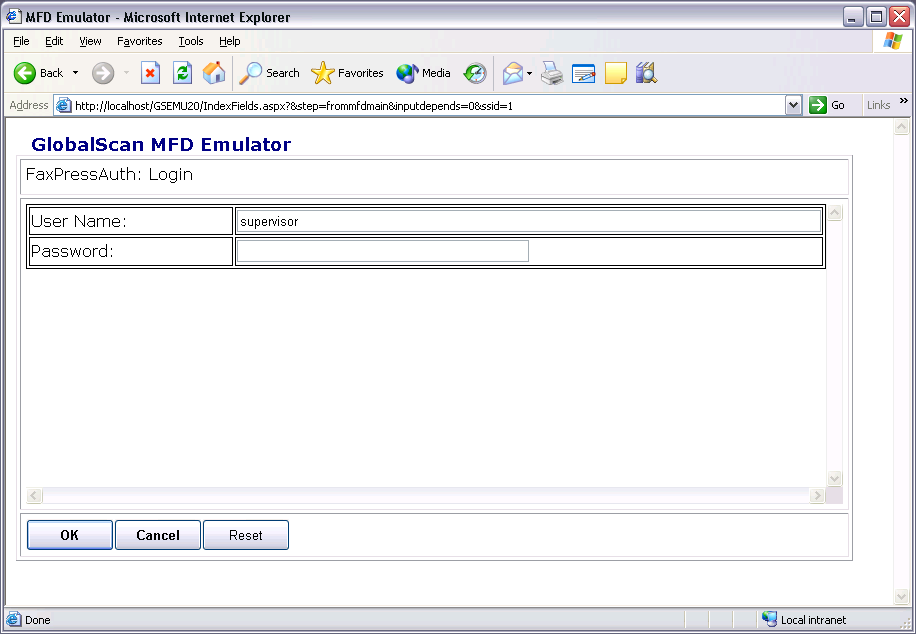
FaxPress Authenticated Service
FaxPress authenticated service is very similar, except for a login screen that the user needs to complete before the scan button is enabled.
Users need to enter their personal FaxPress account credentials to login to the FaxPress before they can send a fax.
|
FaxPress WebHelp
Last Updated: 9/12/2007
E-mail this page |
Castelle 855 Jarvis Drive, Suite 100 Morgan Hill, CA 95037 Toll-free 800.289.7555 Tel 408.852.8000 Fax 408.852.8100 |